Picgo图床

目录
注意
本文最后更新于 2022-06-01,文中内容可能已过时。
警告
请不要再使用gitee作为图床,因为gitee加了防盗链,使用一段时间后所有图片的外链都会失效,挺麻烦的
1.github上的操作
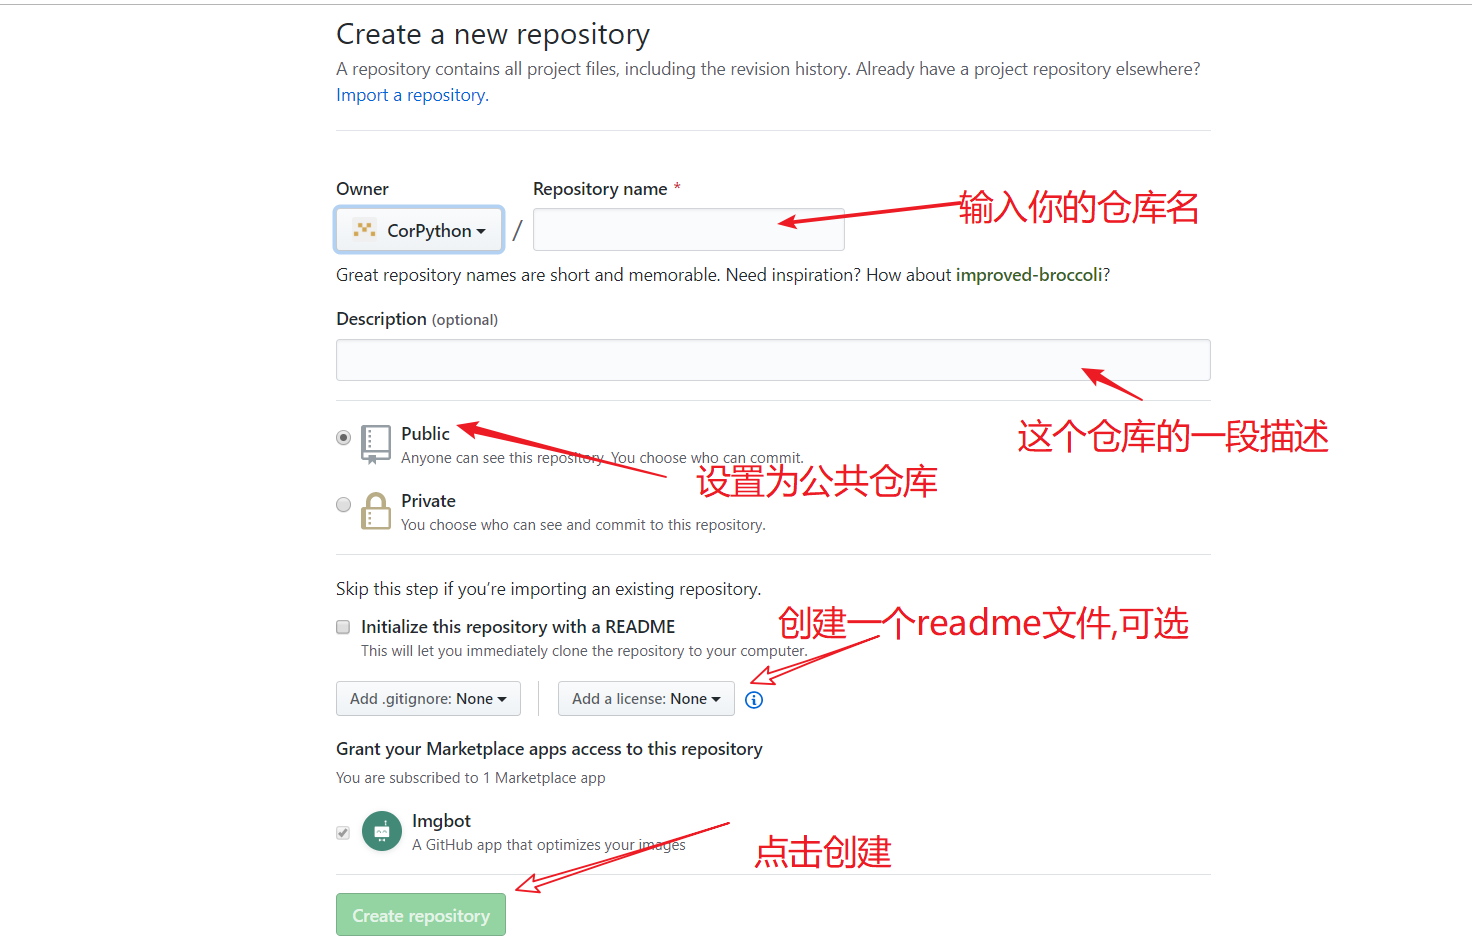
1.登陆自己的GitHub,创建一个新的仓库用来保存上传的图片
2.创建自己的token
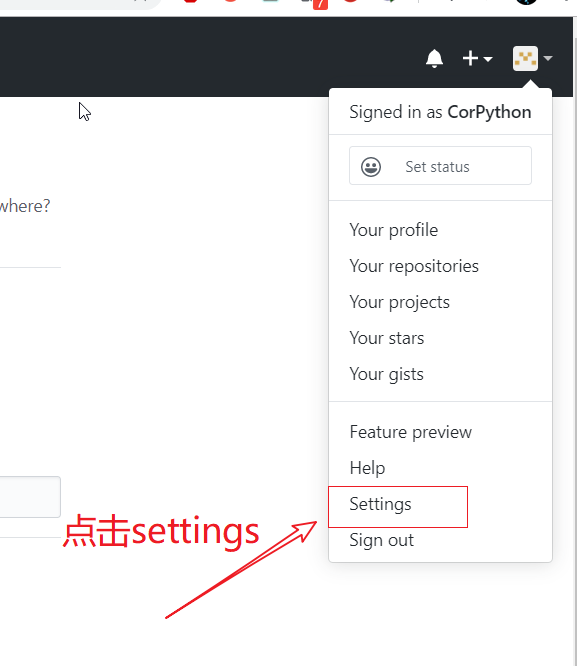
1.点击settings
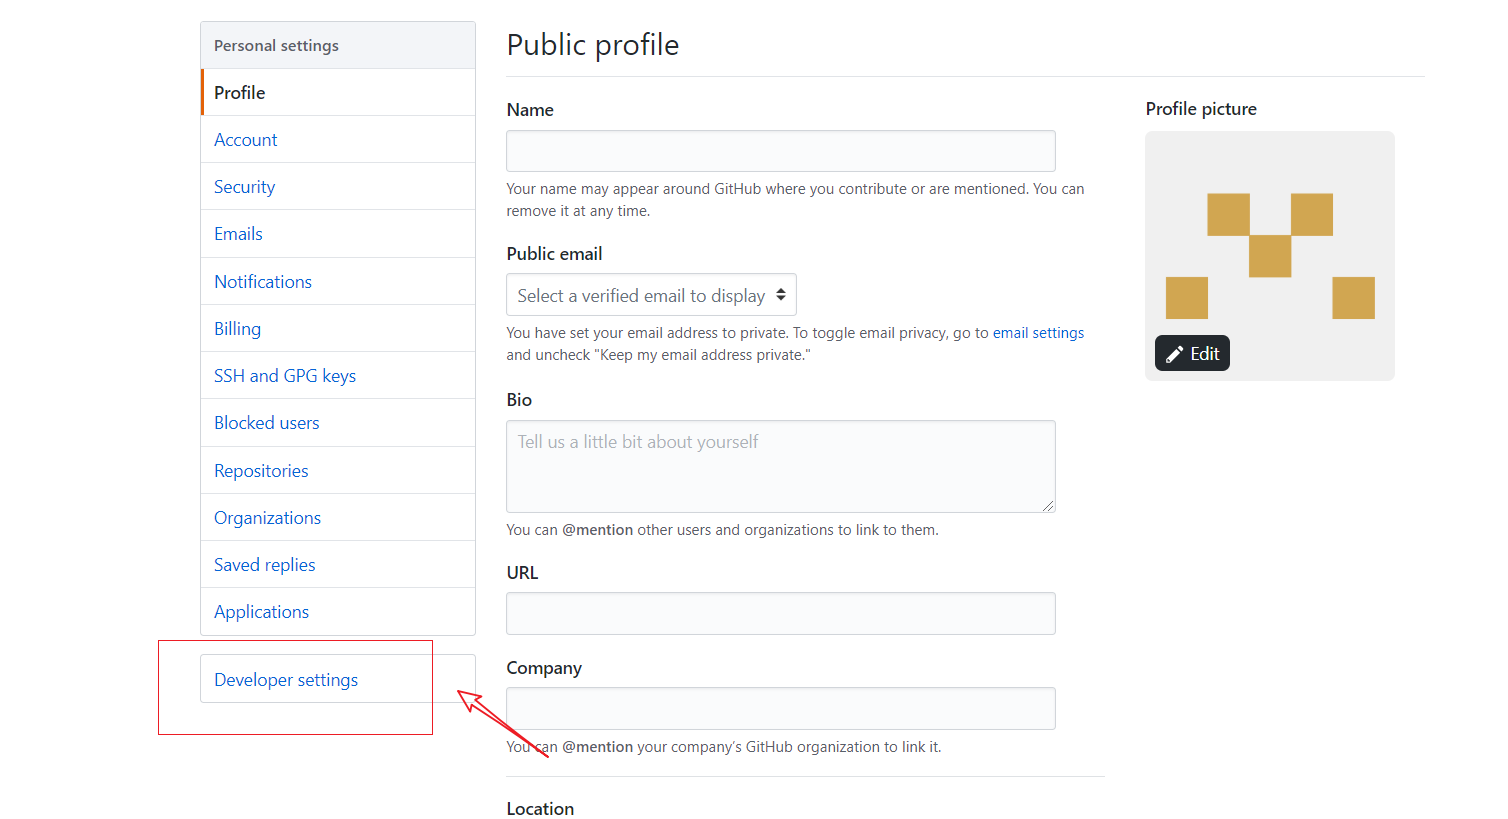
2.点击Developer settings
3.点击Personal access tokens

4.点击Generate new token,生成自己的token
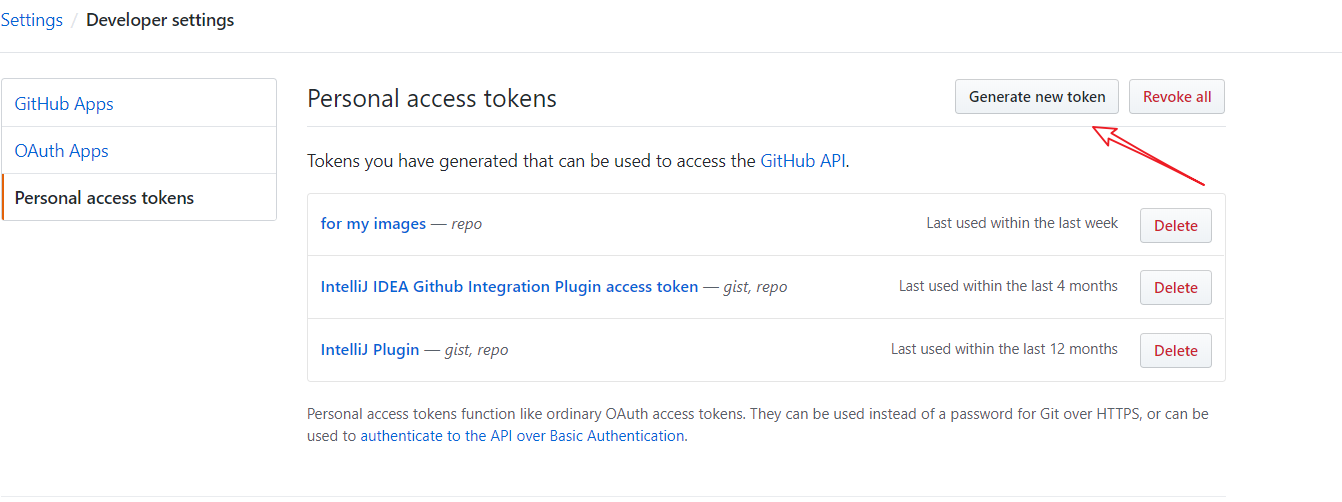
5.填写完毕信息后直接Generate token

6.保存好token密钥
注意:生成的token只会在第一次进入这个页面会出现,所以请先不要关闭这个页面,等后面配置好picgo再关闭
2.配置picgo和jsDelivr加速
- 没有下载
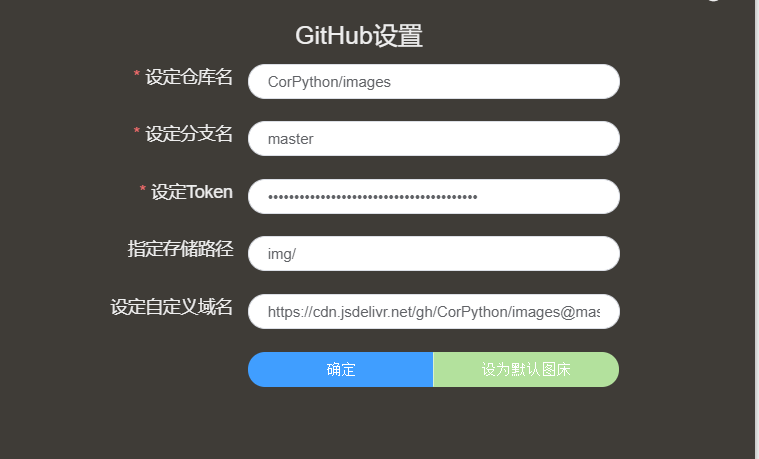
picgo的朋友,请点此下载 - 设定仓库名:按照
用户名/图床仓库名的格式填写 - 设定分支名:
master - 设定 Token:粘贴之前生成的
Token - 指定存储路径:填写想要储存的路径,如
img/,这样就会在仓库下创建一个名为img的文件夹,图片将会储存在此文件夹中 - 设定自定义域名:它的的作用是,在图片上传后,PicGo 会按照
自定义域名+上传的图片名的方式生成访问链接,放到粘贴板上,因为我们要使用jsDelivr加速访问,所以可以设置为https://cdn.jsdelivr.net/gh/用户名/图床仓库名,如/images/
我的配置如下图
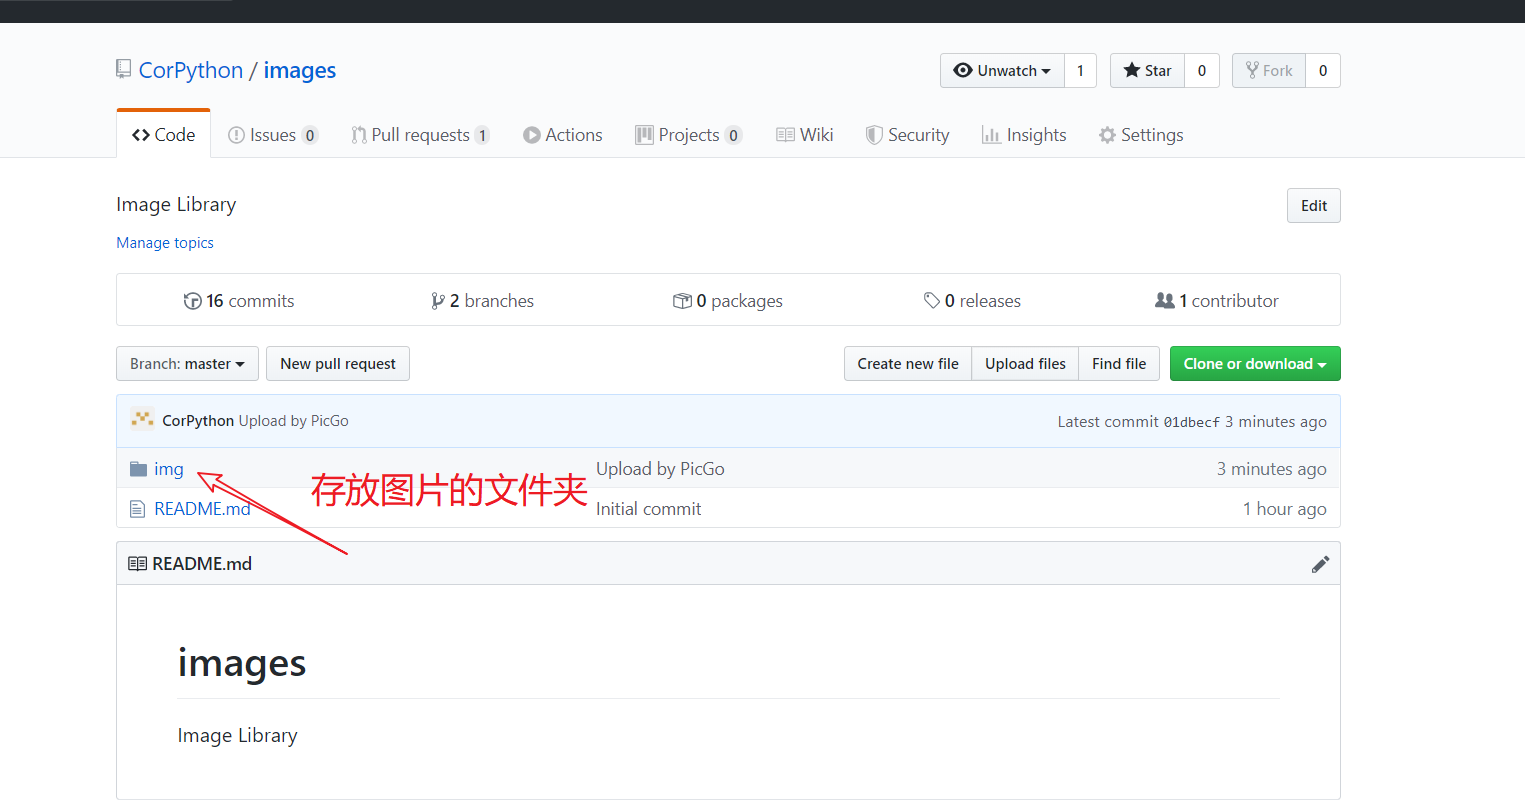
在github中的显示如图
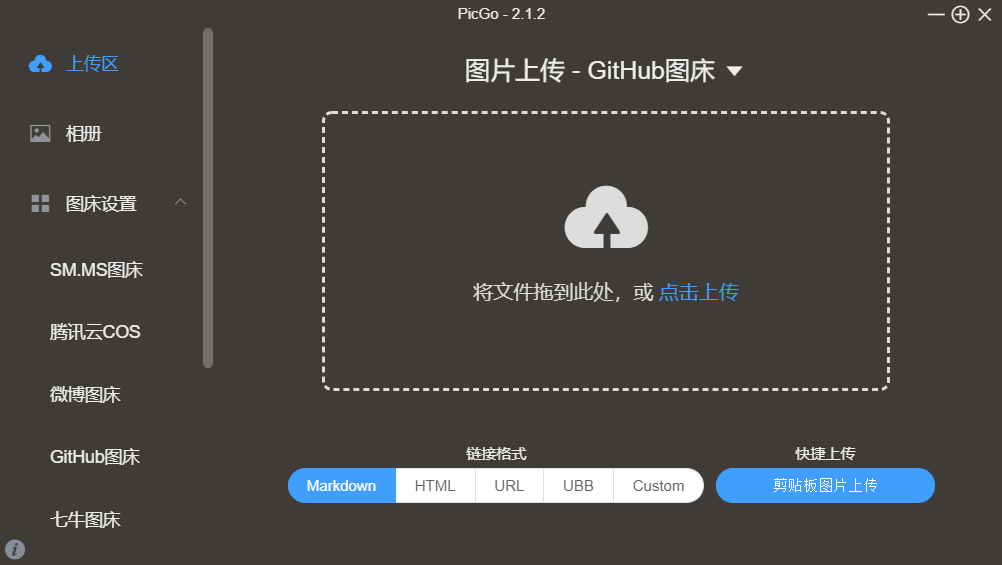
3.配置完成
直接上传你的图片即可
4.配置gitee图床
由于github图床不是很稳定,并且由于服务器在国外的原因,访问速度不够快,所以本节给出了gitee图床的配置
注意
在配置gitee图床前,需要在gitee上新建一个仓库用来存储你的图片!
我的配置图片如下:
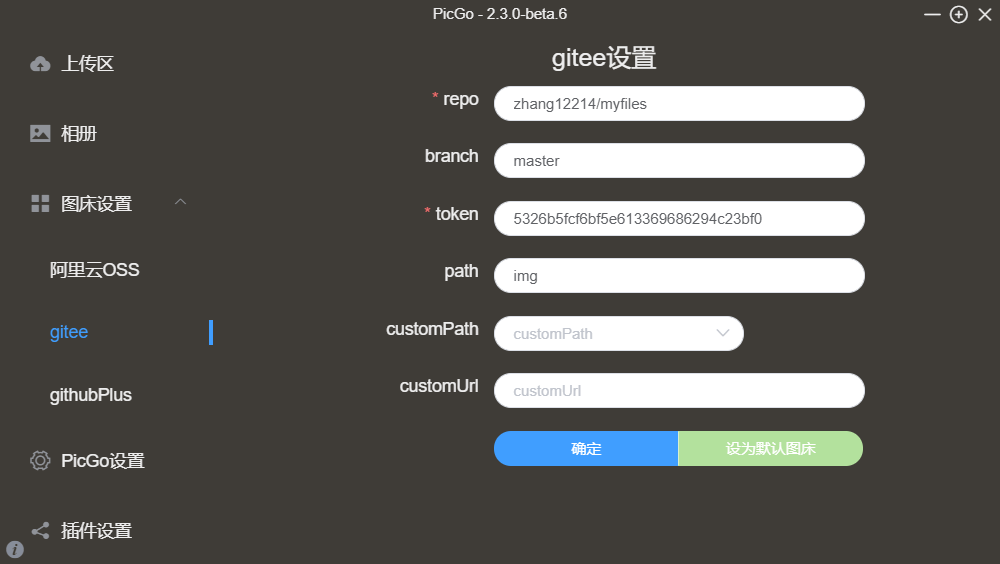
-
repo:用户名/仓库名称,比如我自己的仓库Barneys/myfiles/,也可以直接复制仓库的url
-
branch:分支,这里写上master
-
token:填入码云的私人令牌
-
path:路径,一般写上img
-
customPath:提交消息,这一项和下一项customURL都不用填。在提交到码云后,会显示提交消息,插件默认提交的是 Upload 图片名 by picGo - 时间
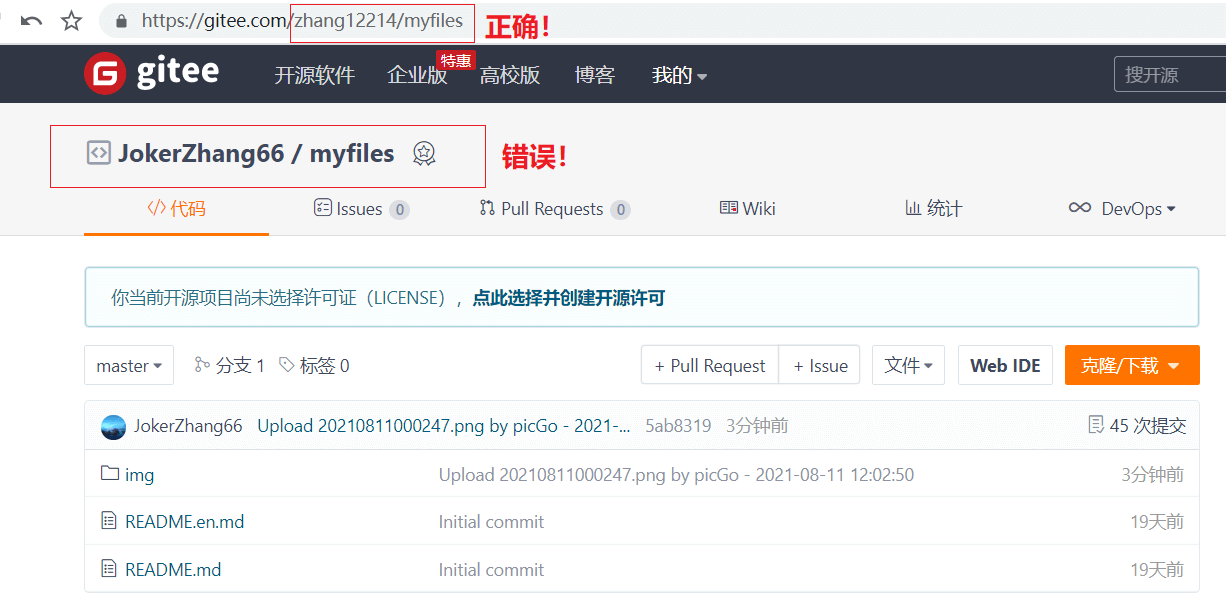
repo注意不要填错!!!
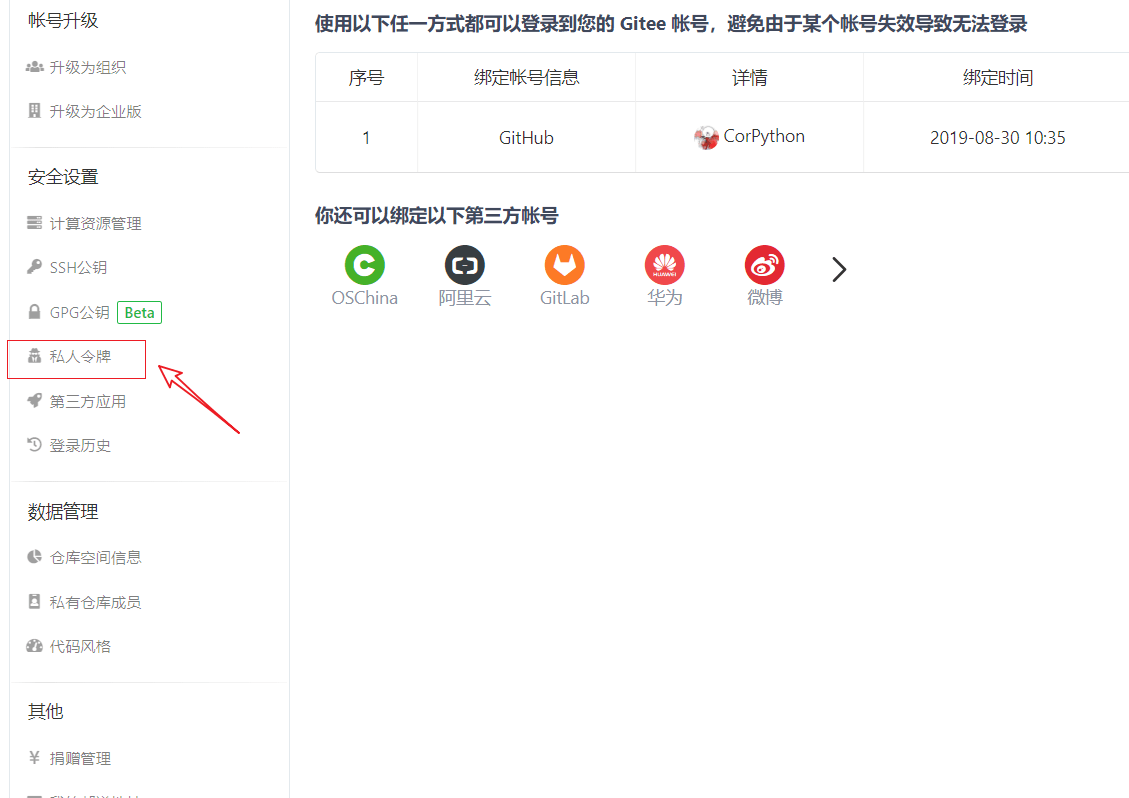
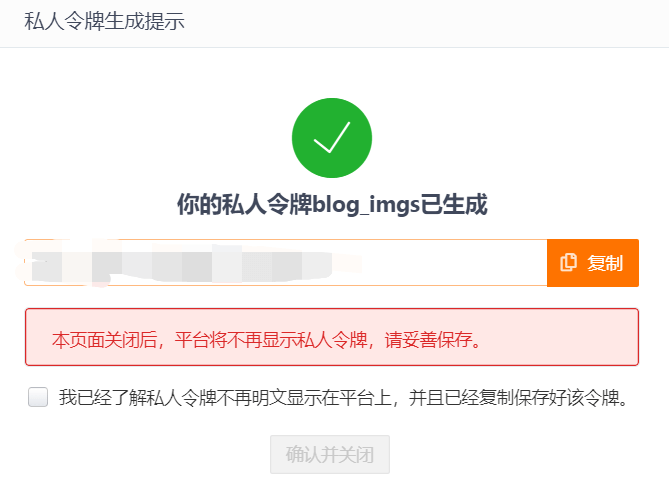
token获取:进入个人设置,点击私人令牌
点击生成新令牌,填写私人令牌描述(随便填一个名称),选中Projects
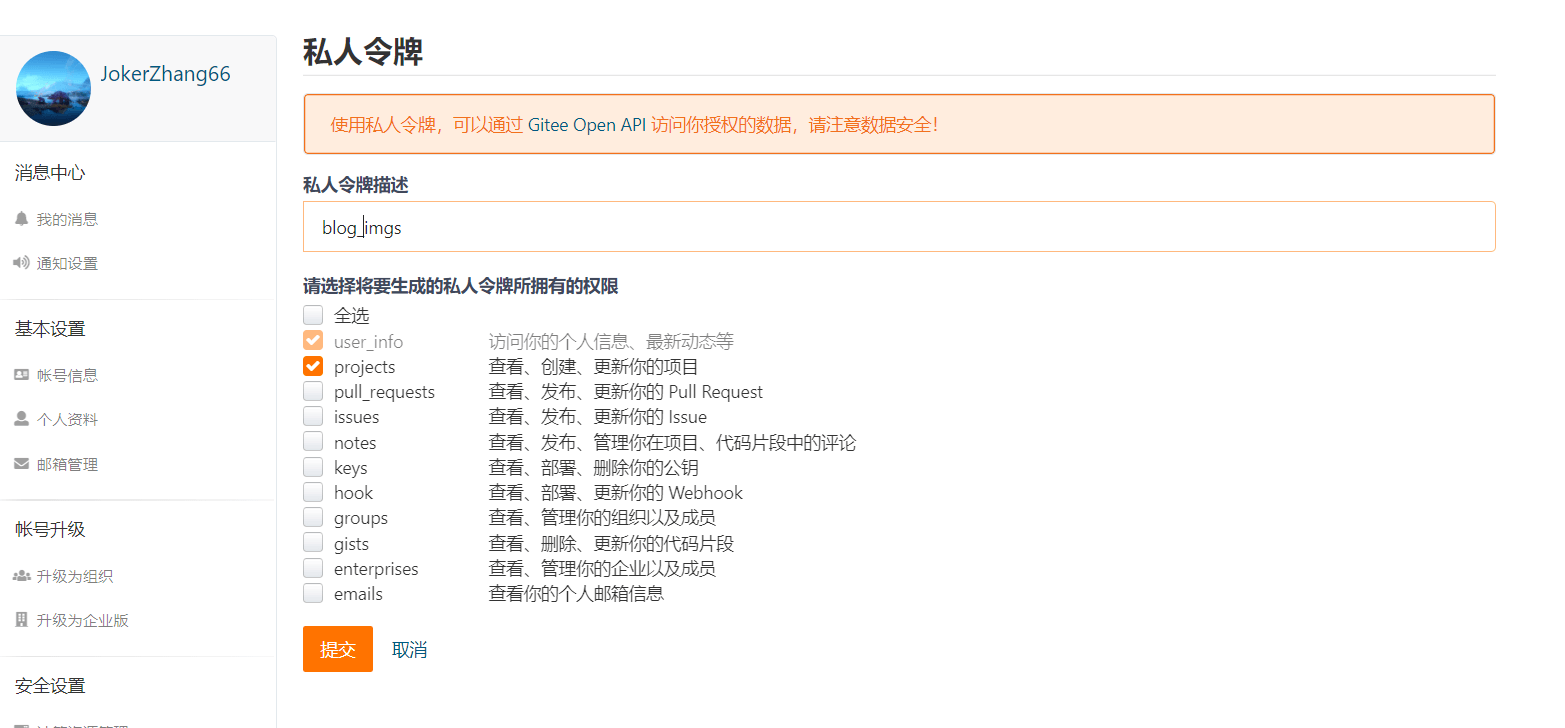
复制生成的token
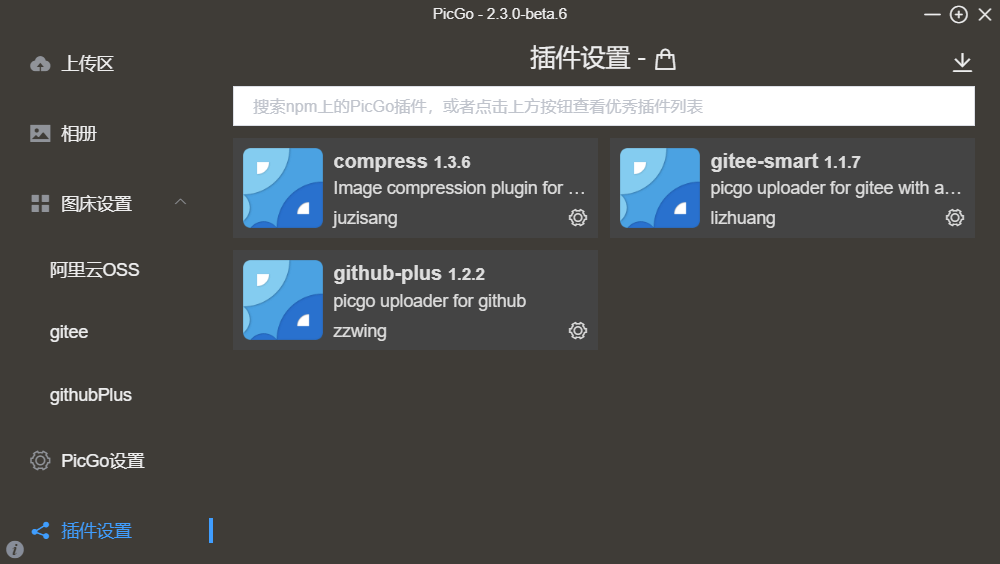
最后,gitee上的图片超过1M需要登陆验证,所以用在hugo上的图片需要保证在1M以内,可以使用compress插件来实现